
Getting ready to start the year and want to play around with some add ons? Doctopus gives you some functionality that Google Classroom hasn't provided yet. This means it can be a great substitute or an extension of using Classroom.
Feel free to make a copy of the following Google Doc to share with your colleagues & friends:
Getting Started:
What is an add-on?
- An add-on is an app or extension to your Google Docs or Spreadsheets. They give you the ability to do something beyond what Google allows.
- In the past, there was the option to use scripts, this has taken its place for most functions.
What this guide will help you with:
- Doctopus - a digital photo-copier for your students
- gClass Folders - an extension of Doctopus that creates folders for your classes from a spreadsheet
- Goobric - A chrome/Doctopus extension that allows you to attach a rubric to any Google doc shared with Doctopus.
How to get Add-ons:
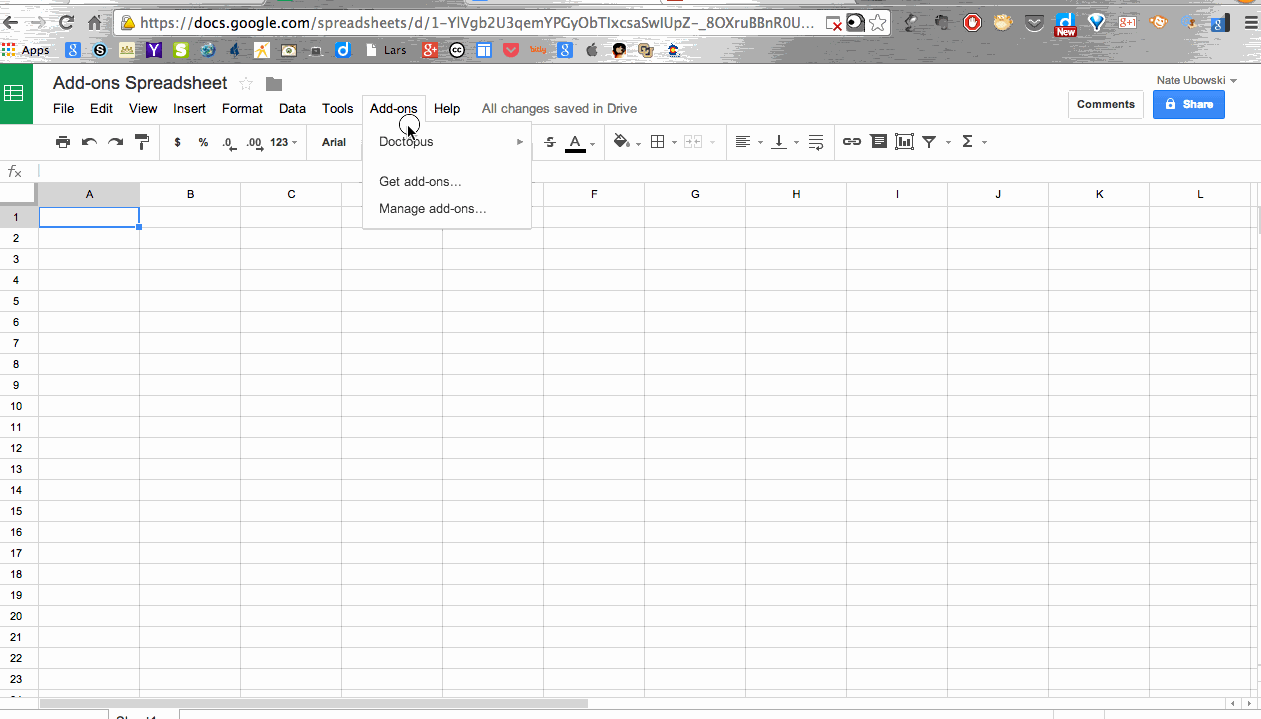
Open up an old/new spreadsheet or doc, select Add-ons from the file menu, then select get add-ons.

When the add-on store comes up, search for any add-on that you would like to use. For us, we will be searching for Doctopus.
You may have to deal with the pop-up blocker - if so, just override the error so that you can give Doctopus the rights it needs to run.
Any time that you “get” an add-on, you will have to give the add-on permissions for it to work its magic.
Creating a Roster:
In order for you to use Doctopus with your class, you need to have a roster with first names, last names, and gmail accounts. *it is important to have the last name especially if you have students with the same name.
There are ways to export this information from most gradebook programs (ask your technology coach for help). If you are pressed for time, you can always create a Google Form to have students fill in their information. Either way will give you a class roster that you can use to build your roster.
Once you have your roster information, you can launch Doctopus.
Go to your Add-ons menu option again, and select Doctopus, then select set-up (This menu option will change depending on how much you have used Doctopus before)
Go to your Add-ons menu option again, and select Doctopus, then select set-up (This menu option will change depending on how much you have used Doctopus before)
From here, you will be working in the right hand sidebar for a few steps,
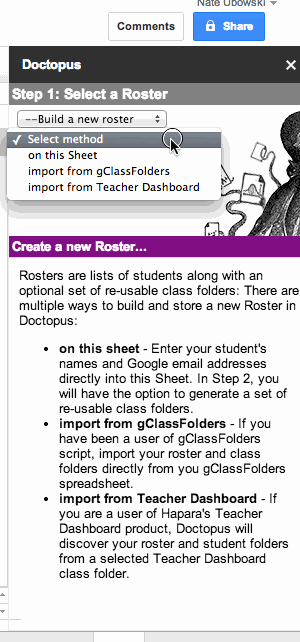
Step 1: Select/Build a roster
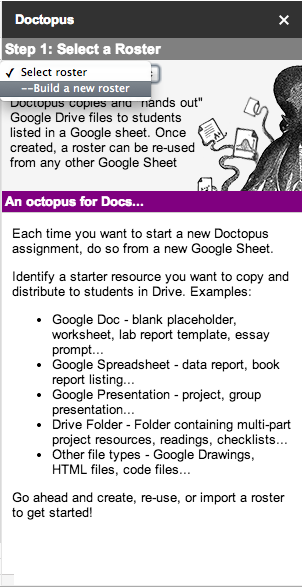
You will be given an option on the method to build your roster:
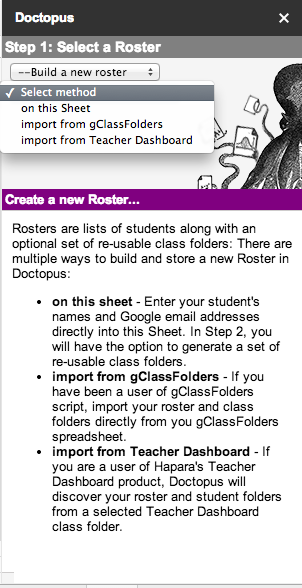
If you are starting everything from scratch, select “on this sheet”. Then hit Create Roster
Step 2: Finalize/Save Roster
Now is where you get to put in all of the student’s information (names & emails). Copy and pasting definitely works. My example is just with my email since I don’t want to violate FERPA with any of my real students’ names.
- Fill in names and emails
- Give the roster a name (I use a different roster for each period/section of a class I teach)
- Click Create and Share folders (If you don’t want to create folders with your students, leave this box unchecked). ***Keep in mind, you can always delete folders; you can delete later if you want.
- This is gClass Folders working with Doctopus. It populates the folders and sharing properties automatically. The folders created are:
- Student dropbox (A folder between just you and each individual student)
- Class Edit folder (Anything in this folder, the class can edit - great for collaborative notes)
- Class View Folder (Anything in this folder, the class can only view)
Doctopus will save all of your rosters, you just have to add each roster individually and save them in step 2 of Doctopus. You can also delete any roster from this same menu after it has been created.
Sharing with Doctopus:
Now that we have created a roster and set up folders, we can now operate in a paperless classroom using Google Docs & Doctopus.
One of the great things about Doctopus is that it saves time by not having to have students make a copy of every document that they need to work with.
KEEP IN MIND: every document that you want to share with your students has to be in a folder; it cannot be housed in “My Drive”.
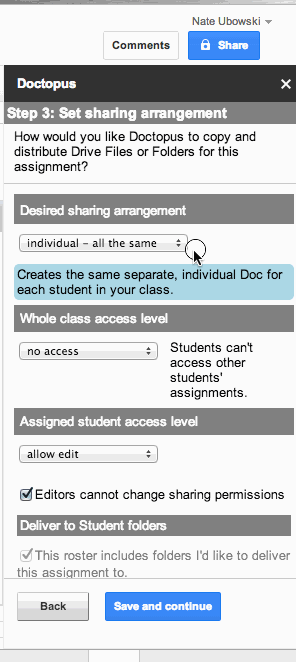
Step 3: How do you want to share your document?
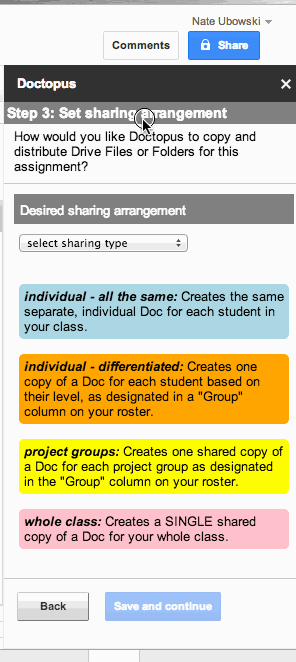
Step 3 (Cont) Sharing properties:
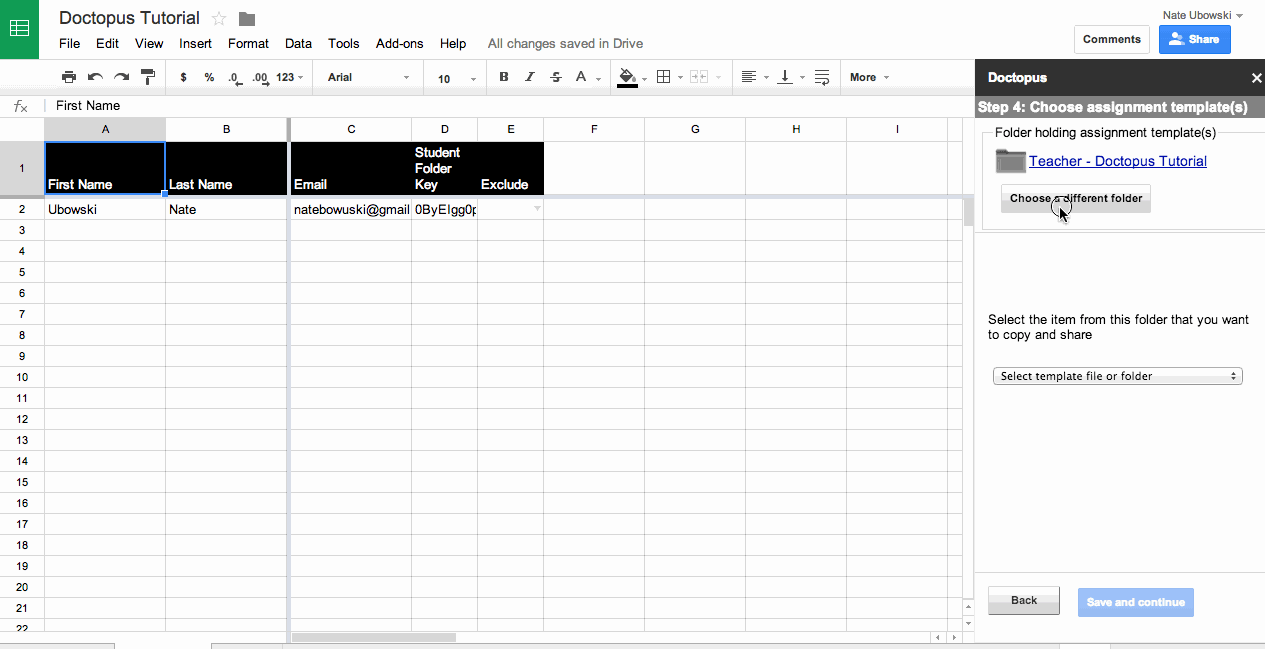
Step 4: Choose Assignment/Template
First thing about choosing the assignment is that you have to choose the folder the document/spreadsheet/presentation is in first.
After you choose the folder, then choose the document you want to share out in the dropdown menu
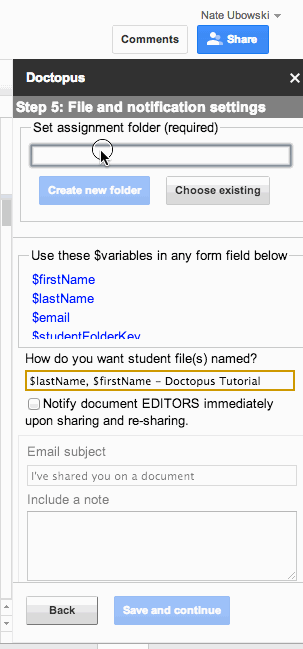
Step 5: File and Notification settings:
Choose the destination folder for the students’ copy of the document
- Choose existing (Window pops up that you can choose a destination folder)
- Create a folder named whatever you want
- You must hit the create folder before proceeding to the next step
You can also send an email to students when you share this assignment (I don’t usually do this so I don’t flood their email boxes).
Step 6: Run, Copy, & Share:
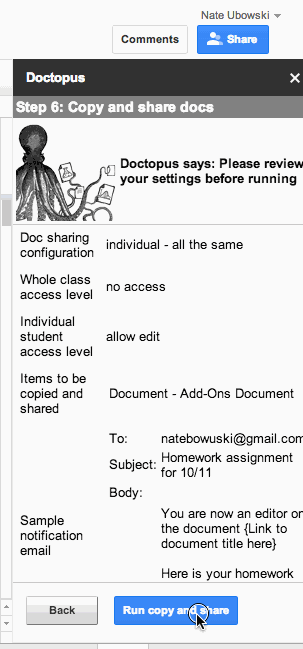
Depending on the size of your class, this could take several minutes.
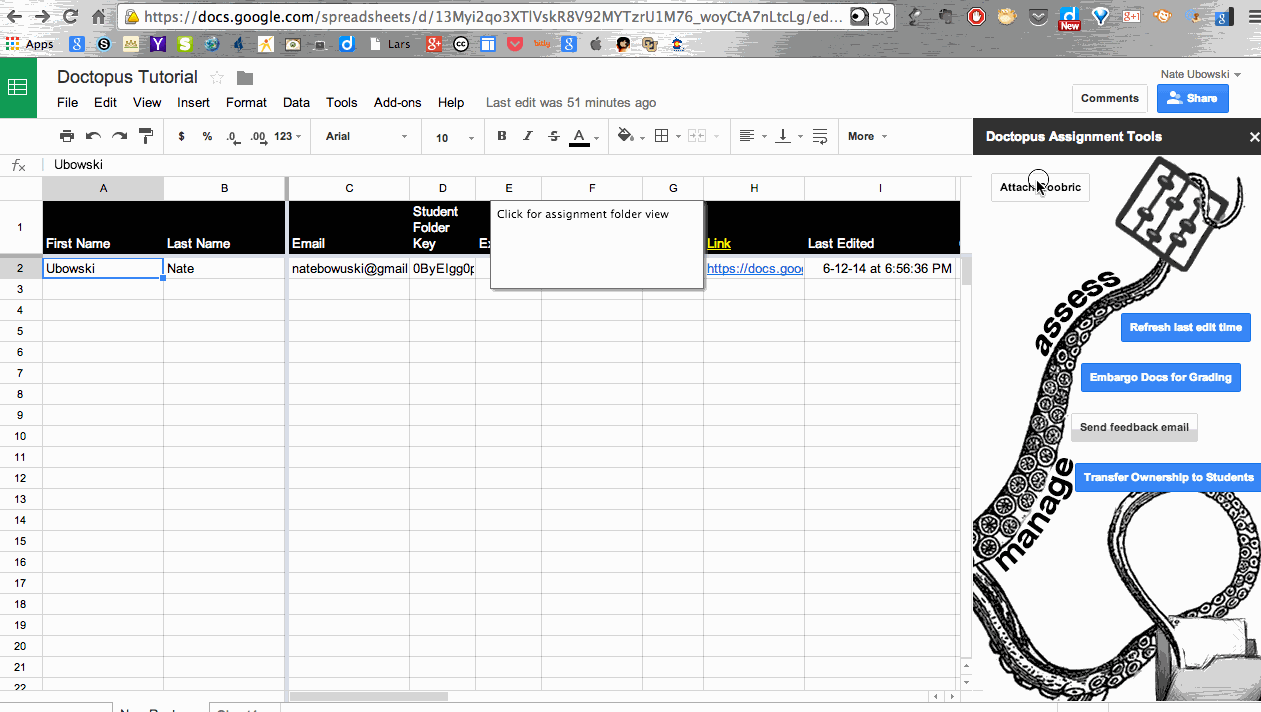
Your Doctopus Options after Sharing
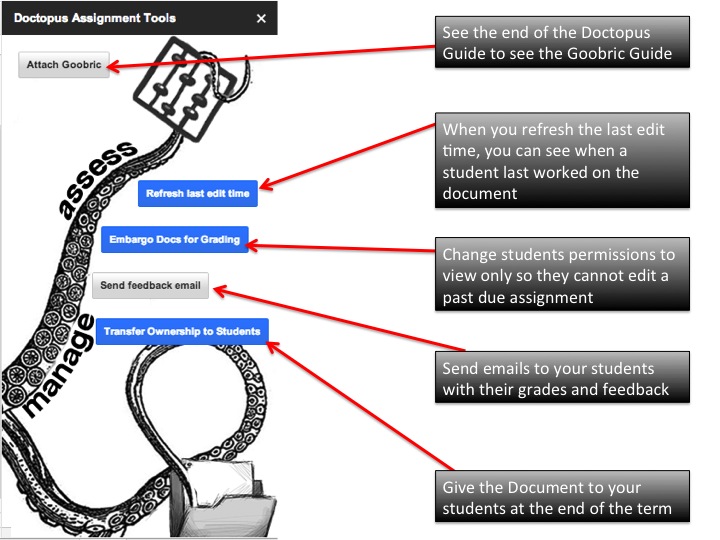
Embargo Document for Grading:
If you want to grade something and not let students edit the document, you can turn the students’ rights to view only through the “Embargo Docs” for grading option.

Exclude Student
There is an exclude option which allows the Doctopus embargo to skip that document. This is perfect for a student who needs extra time on assignments or if a student was absent from class the day the document was being used.
When you check exclude, you can run the embargo and it will skip that student.
If you need to restore it, you can Unembargo the document again.
If you need to delete an exclusion, just highlight the cell for that student and delete the exclude.
Doctopus Notes
Anytime you want to access these options on a spreadsheet where Doctopus was ran, just go to your Add-ons on the menu and launch Doctopus again.
Everytime that you want to assign something using Google Docs, you just need to create a new spreadsheet and launch the Doctopus Add-on and walk through the steps again, without having to create new rosters.
Many wonder what Doctopus will look like after Google Classroom is introduced in the fall. The creator of Doctopus, Andrew Stillman, shares his thought on Google +.
Continue reading for the Goobric Walkthrough
⇓
Goobric Tutorial
**Only available using Chrome as your web browser
Install Goobric Extension
- Add the extension by hitting +Free
- Click add “Goobric” when the popup shows up
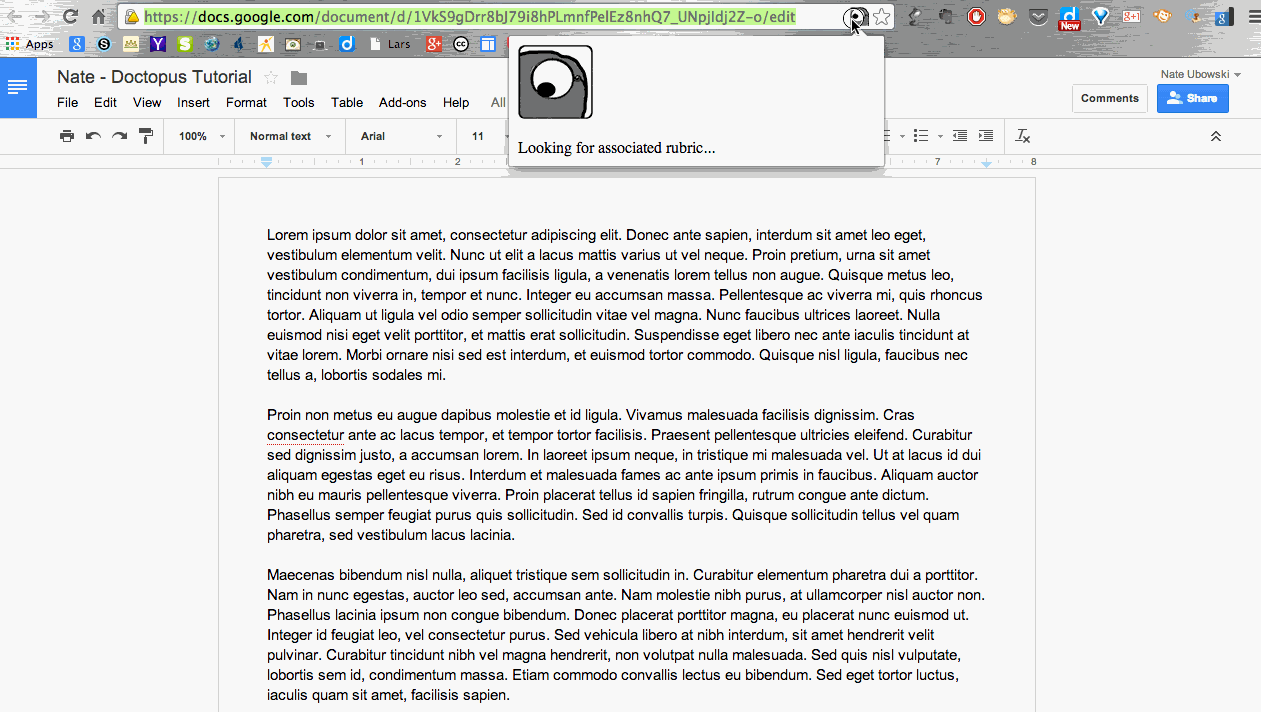
- You will see a little logo show up on your address bar on any page that will allow a Goobric to be used (Google Docs)
Create a Rubric
You need to create a rubric on a Google Spreadsheet in order to use it for Doctopus
- The categories need to be on the Y-Axis
- The proficiency levels need to be on the X-Axis
Launching Goobric
To add a Rubric to an assignment from Doctopus, run the Doctopus add-on and select “Attach Goobric” from the choices.
You will have to authorize the Goobric Web App before selecting a rubric.
Select a rubric (it will only show spreadsheets to choose from - Super handy!).
You have added a rubric to every student’s assignments from the Doctopus spreadsheet.
Grading with Goobric:
- Now that you have added the rubric to the documents, you are ready to grade them.
- Remember that one special little icon from your address bar?
⇐Yeah, that one.
- Go ahead and click on that icon to open up your rubric.
- You will have to enter the number score in order for it to register the score.
You will have the option to email the rubric directly to student to provide immediate feedback. It will send them an email with the rubric and any comments added in the comments field.
After you press submit and paste to Doc, the rubric will show up at the end of the document (All fields that were chosen will be greyed).
One downfall of Goobric is that it doesn’t automatically populate a total score based on the entered scores.
Goobric in a Doctopus Spreadsheet:
After you have added a rubric with Goobric, there is a new sheet where the scores will show up for each rubric scored. You will be able to see the scored documents.
The document link will normally have the title of the document, so if you name the document with the student’s last name, it is easy to see the progress of each student.
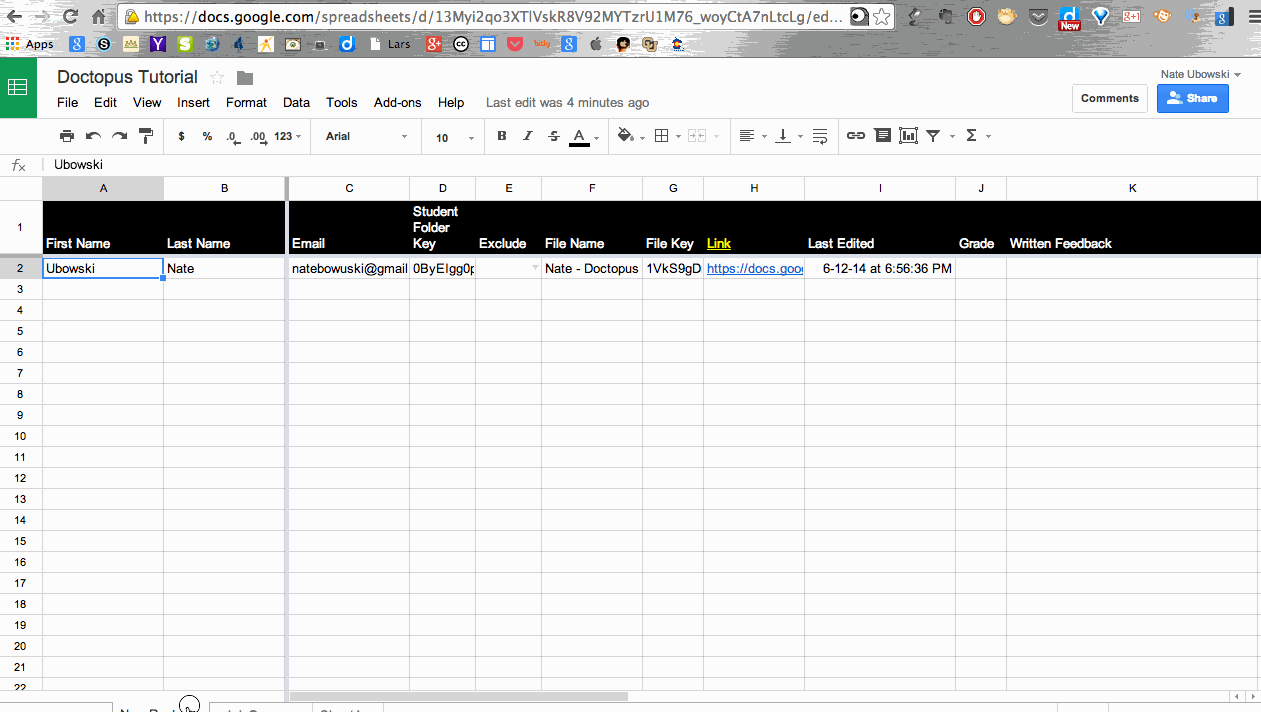
On the roster sheet, you can scroll all the way to the right to see the scores. The names stay locked so you can always keep track of the name and scores across the same row.

That last box labeled “Count” is the number of times that the document was graded using a rubric.
Goobric Notes:
A couple things to know about using the Goobric extension:
- When you are grading in the extension, if you click anywhere outside of the popup, your popup will disappear, but it should save what you have entered.
- Your scores will not be saved officially until you click the submit and paste button.
- Goobric doesn’t automatically add up or tally the score from the rubric; this is something you will have to do manually.
- If you amend a scored rubric, it will append the document with the new version of the rubric after the old rubric. Both will show up.
- When you grade using Goobric, there is a “Count” column that lets you know how many times you have graded that documents.
Hi,
ReplyDeleteThank you for this tutorial. I am new to Doctopus/Goobric and here is a question: gClassFolders add-on seems to overlap with Doctopus in certain functions. Can I use JUST Doctopus without gClassFolders? Or would you recommend to use both? I want to try it with my students, but I first need to be sure of what I (as a lecturer) am doing :-)
You can definitely use Doctopus without the gClass folders. When you are building your roster, just don't select create class folders.
DeleteI recommend both because I like to have the folders set up because I can put whole class assignments or notes in the view/edit folders. And the individual student "dropbox" folder allows me to push all doctopus assignments there and if they create a document on their own, they can save it in that folder for me to see.
Thank you for your reply. What I mean, is it better to use Doctopus for everything (I thought I could also create folders with Doctopus and not GCF?) because it seems it is somehow linked to Goobric, or, in other words, how is the combination of Doctopus and GCF better than using just one of them?
ReplyDeleteIs there a way to do 5 columns instead of 4?
ReplyDelete